Keepsake Pouch
 |
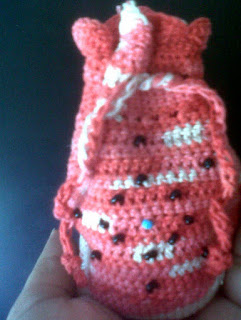
| The pouch when the drawstrings are tied. |
To start with, I chose the wrong crochet thread for my pouch - it takes a lot of time to crochet a decent-sized pouch with cotton crochet thread! I also got caught up with stuff and couldn't even begin it in time!
So, instead, I decided to make it for myself. No hurry at all, though when it was almost over I couldn't help trying to finish faster. The gestation period was just so long!
In the end, it has come out rather nice, and has interesting texture. I am including a basic pattern that can be modified as you go along.
 |
| With the drawstrings open |
There wasn't any specific pattern followed for the pouch, but for the base at least I've stuck to the basics of increasing in the the round.
Pattern
The bag is worked in rounds, with the base in spirals.
Materials
Crochet thread/yarn - I used a size 10 thread with a 1.75mm crochet hook to end up with a bag that is about 11cm tall
Appropriate crochet hook
Beads
Stitch marker - if you don't have one, a simple paper clip will do.
Tapestry needle.
Method
I've used the magic ring method to begin. If you want to try this or the foundation chain method, Crochet Me has a good tutorial.
If you are including beads in your design, now is the time to do so. For my concentric circles I added 8 black, followed by 1 in a contrasting colour and 8 more black. It is very important to add the beads in advance if you plan to work them into your design.
 |
| The base. You can make out the spiral. |
To begin, chain 2. In 2nd chain from hook, work 7 sc. Insert stitch marker. (7st)
Round 2
2 single crochet (sc) in each stitch around (14st). Move stitch marker.
Round 3
*2 sc in 1st, 1 sc in next sc*. Repeat from * to* around (21st). Move stitch marker.
Round 4
*2 sc in 1st, 1 sc each in next 2sc*. Repeat from * to* around (28st). Move stitch marker.
Round 5
*2 sc in 1st, 1 sc each in next 3sc*. Repeat from * to* around (35st). Move stitch marker.
Similarly, keep on increasing the base using the above method till it is wide enough for you. I stopped when I had 98st (Round 14 - *2 sc in 1st, 1 sc each in next 11sc*. Repeat from * to* around)
To create the sides
sc in each st around. Move stitch marker.
Continue this till the bag's sides start to take shape and you are ready for the detailing.
Crossed double crochet round
Chain 3. This will be your first dc. Skip the 2nd st, dc in next. Do a dc in the skipped stitch. For details check here. Repeat this all around till 1 st is left. End with a dc and slip st to the 1st stitch.
 |
| A closeup of the bead design |
Single crochet round
Sc in each st across
Double crochet round
Chain 3. Do a dc in each stitch across
Single crochet round
Sc in each st across till you are halfway around (49st). Now is the time to introduce the first bead. Insert hook in st, yarn over including the bead, making sure the bead is on the outside and is not pulled through. Complete the single crochet. Continue to do a sc in each st across till the end.
Alternate the rounds with a double crochet round followed by a single crochet round.
The stitch count is as follows
From the bottom upwards:
Single bead: sc 49, sc with bead, sc 48
Two beads: sc 43, sc with bead, sc 10, sc with bead, sc 43
Single bead: sc 49, sc with bead, sc 48
Two beads: sc 46, sc with bead, sc 4, sc with bead, sc 46
Five beads: sc 40, sc with bead, sc 3, sc with bead, sc 3, sc with bead, sc 3, sc with bead, sc 3, sc with bead, sc 41
 |
| After the last crossed double crochet round |
Single bead: sc 49, sc with bead, sc 48
Two beads: sc 43, sc with bead, sc 10, sc with bead, sc 43
Single bead: sc 49, sc with bead, sc 48
After the beads are in stitched in, do one double crochet round, followed by a single crochet round and then a crossed double crochet round.
After that, it is time to make the notches for the drawstring.
Chain 5, skip 2 st, *dc in next st, chain 2*. Repeat from * to * around the pouch till at last you end with a dc and 2 unworked sts. Chain 2 and slip stitch to the third chain of the first Chain5.
Next, do one single crochet round, followed by one double crochet round, and a single crochet round.
 |
| Close-up of the scalloped edging |
We do the shell stitch.
For this, chain 3. This is your first dc. Do 8 more dc in the same stitch as the chain 3. Skip 5 stitches.
*Do 9 dc in the next stitch, skip 4 stitches*. Repeat from * to * till the last shell.
We are left with 5 unworked stitches. Skip it and join last shell to 1st shell and fasten off.
Drawstring
For the drawstring, I created a chain that was 2 times the circumference of the bag and then crocheted in the back ridges. It was completed by knotting the edges after putting it through the holes.
I thoroughly enjoyed my bag and I'm currently using it to store my headphones.
As usual, I hope this makes sense! Thank you!


Comments
Post a Comment